


Adding custom fields in Bookedin
With custom fields, you can add your own additional questions to your booking form, ensuring you always collect the right information from your renters. Think of special requests, address details, or whether a guest is bringing pets.
Always ensure you are making changes to the correct calendar. The form is unique to each individual calendar!
Log in to your account
Go to https://app.bookedin.nl/login/ and log in with your credentials. After logging in, you will see the dashboard.
Check if you have a calendar
- checkAlready created a calendar? → Proceed to step 3.
- checkNo calendar yet? → Follow the guide "Make your first calendar" first.
Navigate to Plugins > Booking Form
In the menu, click on Plugins and choose Booking Form. On this page, you will see two columns:
- checkForm Settings (left)
- checkBooking Form (Preview) (right)
Default fields
Bookedin automatically generates a booking form for every calendar. By default, it contains the following fields:
- checkName
- checkPhone number
- checkEmail
- checkStreet
- checkHouse number
- checkCity
- checkPostal code
- checkMessage
Adding custom fields
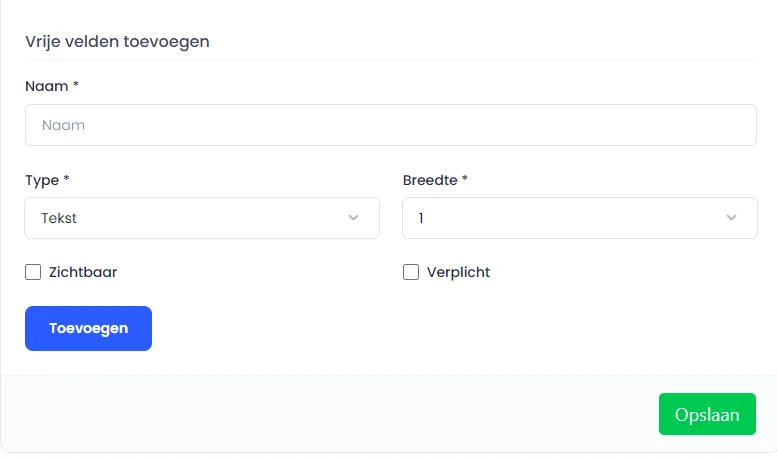
At the bottom of the left column (Form Settings), you will find the heading Add custom fields.
Here, you will see the standard input fields: Name, Type, Width, Required checkbox.
Step-by-step: Adding a custom field
- checkEnter Name: Give the field a logical name that is clear to your renter.
• Examples: First Name, Address Details, Postal Code. - checkChoose Type: Select the type of field you want to add.
• See all options in the guide: "All available field types". - checkSet Width: Choose a width between 1 and 12.
• Example: Setting it to 6 means the field will take up half the row (50%). - checkSet Required Field: Check the Required box if this field must be completed before a booking can be finalized.
- checkAdd: Click the blue button "Add".
• The field will immediately appear in the preview form (right column). - checkSave: Click the green button "Save" to finalize your changes.
All set! You have successfully added a custom field to your booking form. Repeat these steps to add more fields and fully customize your form.